")
How to Prepare the Acrylic Sheet for Cutting
Proper preparation makes a significant difference in achieving smooth and accurate cuts. Follow these steps to set up the material correctly:
Position the Acrylic Sheet Securely
- Place the 60mm thick acrylic sheet on the table saw with full support on both ends.
- Use a roller conveyor or stable surface to prevent shifting.
Mark the Cutting Path Clearly
- Apply masking tape along the cutting line to reduce chipping.
- Use a fine-tip marker or scribing tool to create a visible guideline.
Secure the Material in Place
- Clamps or guiding fences will help prevent movement during cutting.
- A well-supported sheet will reduce vibrations, leading to cleaner cuts.
 Optimal Table Saw Settings for 60mm Thick Acrylic
Using the right blade and speed settings will significantly improve cutting accuracy and surface finish. Below are the recommended settings:
| Blade Type | RPM (Speed) | Feed Rate (mm/s) | Depth Per Pass (mm) | Cooling Required |
|---|---|---|---|---|
| Carbide-Tipped Blade | 2,500 – 3,500 | 5 – 10 | Full-depth single pass | Yes (Air Cooling) |
| Diamond-Coated Blade | 2,000 – 3,000 | 3 – 8 | Full-depth single pass | Yes (Water Cooling) |
| Acrylic-Specific Blade | 1,500 – 2,500 | 2 – 6 | Full-depth single pass | Yes (Air or Water) |
Cutting Process: How to Saw the Acrylic into Strips
Start with a Test Cut
- Run a test cut on a scrap piece of acrylic to fine-tune speed and feed settings.
Cut the Acrylic Sheet into Strips
- Align the sheet with the table saw blade and ensure a steady hold.
- Turn on the saw and push the sheet forward using a push stick for safety.
- Allow the saw to cut through the full 60mm depth in one smooth pass.
- Maintain a consistent feed rate to prevent uneven cuts.
Manage Heat and Cooling During Cutting
- If melting occurs, slow the feed rate and increase cooling application.
- Compressed air or a light water mist will help keep the blade temperature low.
Repeat the Process for Additional Strips
- Continue cutting until all required strips are completed.
- Double-check dimensions to ensure consistency across all pieces.
Post-Cutting Finishing Steps
After cutting, the edges of the acrylic strips might need additional processing to improve clarity and smoothness. The following techniques will help refine the edges:
- Edge Sanding – Use 400-800 grit sandpaper for a polished surface.
- Flame Polishing – A butane torch can restore optical transparency.
- Buffing – A polishing wheel with a compound can create a high-gloss finish.
Applications of 60mm Thick Acrylic Strips
Once the acrylic sheet has been cut into strips, these materials can be used for various high-strength applications, including:
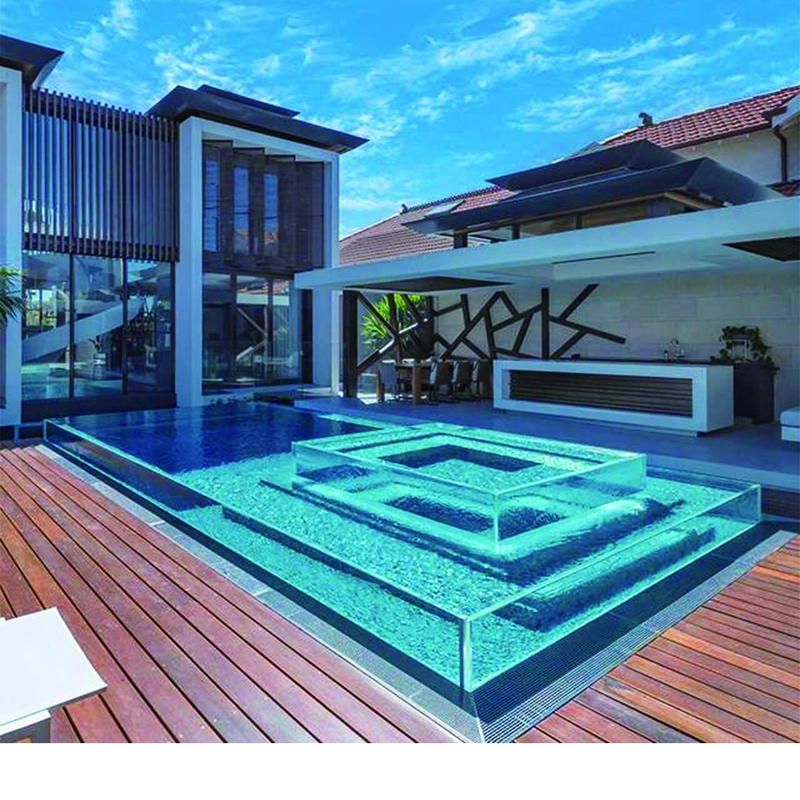
- Large aquarium panels for public or private aquariums
- Transparent swimming pool walls and viewing windows
- Architectural installations and decorative acrylic structures
- Industrial safety shields and protective barriers
- Luxury display cases and high-end retail fixtures
Conclusion
Using a table saw is one of the best ways to cut 60mm thick aquarium-grade acrylic sheets into strips. With the correct blade, optimal feed rate, and effective cooling methods, you can achieve clean and precise cuts without melting or cracking.
For those seeking custom acrylic solutions, manufacturers like Alands provide high-quality PMMA sheets designed for aquariums, industrial applications, and architectural projects. By following the cutting techniques in this guide, you can ensure strong, visually clear, and professionally finished acrylic products.